Writing a touchscreen driver in Python
I wrote an userspace touchscreen driver using Python after a day of experimenting with both udev (Linux’s device manager) and python-uinput (Python API to uinput kernel module, which allows userspace input drivers to be created).
If you are here for the finished driver, you can pick it up from my GitHub repository here. However, if you’re interested in how I wrote my touchscreen driver, read on.
Background information
I bought a touchscreen for my single-board computer ODROID-XU4 as I was interested in developing a dashboard application that would display different kinds of useful information I could view at a glance, such as website uptime and disk usage. After a little searching I found a touchscreen that appeared to fit my use case to the letter: 5" screen and it uses USB for both power and touch, and HDMI for video.
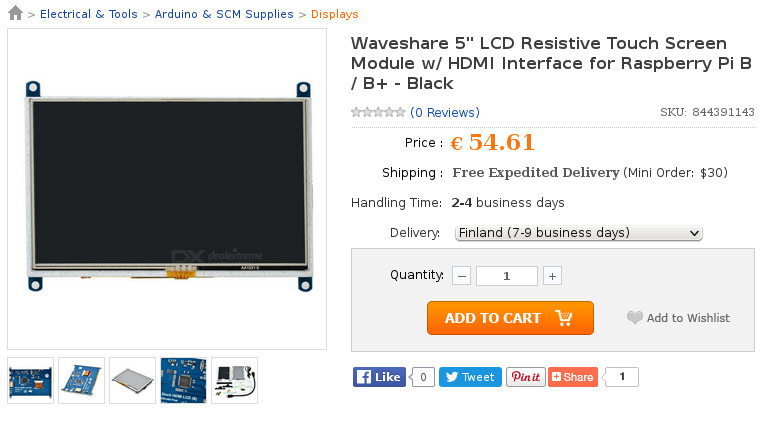
The product I ended up buying on DealExtreme
Unfortunately, this product had one glaring flaw: its touchscreen support relied entirely on a Raspberry Pi Linux image provided on a CD in the product packaging instead of an open source driver one could install on an existing Linux installation. There does exist a driver written in Python and available on Github, but it had a few shortcomings:
- The driver runs constantly on background waiting for the device to be plugged in, instead of being launched automatically when the device is plugged in, and likewise, being stopped when the device is removed.
- The driver emulates mouse events instead of touch events, which means it can’t be calibrated using out-of-the-box tools like xinput-calibrator.
- The driver doesn’t name the created device in a meaningful way; this would cause problems if multiple devices were to be used.
- It turned out that while the 5" and 7" versions of Waveshare’s touchscreens have the same VID and PID (vendor and product ID), they have different packet lengths (22 bytes in 5" vs. 25 bytes in 7"). This meant that in order to support both devices, the driver would have to heuristically determine this packet length.
However, derekhe’s Python driver gave me a good starting point to develop my own driver. Although the device appears in the kernel log when it is plugged in, it gives no more useful information beyond the fact that a device file /dev/hidraw0 is created to listen to raw device input, and the device’s VID:PID is 0EEF:0005.
[607768.282758] [c0] usb 3-1.1.2: new full-speed USB device number 16 using xhci-hcd
[607768.311062] [c0] hid-generic 0003:0EEF:0005.0002: hiddev0,hidraw0: USB HID v1.10 Device [RPI_TOUCH By ZH851] on usb-xhci-hcd.2.auto-1.1.2/input0
However, derekhe’s analysis had a concise explanation of the output. Assuming that the length for each message is 22 bytes (as it is in the 5" model), we can listen to the output in real-time using the following command and see what the device is trying to tell us.
odroid@odroid:~/⟫ sudo xxd -c 22 /dev/hidraw0
0000000: aa00 0000 0000 bb00 0000 0000 0000 0000 0000 0000 0000  ......................
0000016: aa01 098c 0b4f bb00 0000 0000 0000 0000 0000 0000 0000  .....O................
000002c: aa00 0000 0000 bb00 0000 0000 0000 0000 0000 0000 0000  ......................
0000042: aa01 08a5 0832 bb00 0000 0000 0000 0000 0000 0000 0000  .....2................
0000058: aa00 0000 0000 bb00 0000 0000 0000 0000 0000 0000 0000 ......................- The
aawhich every message starts with marks the beginning of the message. - The following 1 byte is either
00(if screen was NOT touched) or01(if screen was touched). - The next series of bytes marks the (X,Y) pair of the the touched spot on the screen. In the second message, the screen was touched at (
098c,0b4f), or in decimal, at (2444, 2895). - The first (X,Y) is then followed by a
bbmarker, followed by what should be multitouch (X,Y) pairs. As our device doesn’t support multitouch, we can safely ignore these, although they will be useful later on when we want to heuristically determine the packet length.
Writing the udev rule
We now have enough information to develop a driver on: the USB VID:PID of the touchscreen in question and the structure of the messages sent by the device. However, we still need to detect when the device has been plugged in so that we can react accordingly and load our to-be-written driver. Thankfully, udev (Linux’s device manager) works very well for this. With our device plugged out of the system, we can use udevadm to listen to device events (such as when a device is plugged in) in real-time. Do so by running the following command and plugging in the device:
odroid@odroid:~/⟫ sudo udevadm monitor
KERNEL[609040.922569] add      /devices/usb.1/12000000.dwc3/xhci-hcd.2.auto/usb3/3-1/3-1.1/3-1.1.2 (usb)
KERNEL[609040.929675] add      /devices/usb.1/12000000.dwc3/xhci-hcd.2.auto/usb3/3-1/3-1.1/3-1.1.2/3-1.1.2:1.0 (usb)
KERNEL[609040.930464] add      /devices/usb.1/12000000.dwc3/xhci-hcd.2.auto/usb3/3-1/3-1.1/3-1.1.2/3-1.1.2:1.0/0003:0EEF:0005.0003 (hid)
KERNEL[609040.933392] add      /class/usbmisc (class)
KERNEL[609040.933663] add      /devices/usb.1/12000000.dwc3/xhci-hcd.2.auto/usb3/3-1/3-1.1/3-1.1.2/3-1.1.2:1.0/usbmisc/hiddev0 (usbmisc)
KERNEL[609040.933880] add      /devices/usb.1/12000000.dwc3/xhci-hcd.2.auto/usb3/3-1/3-1.1/3-1.1.2/3-1.1.2:1.0/0003:0EEF:0005.0003/hidraw/hidraw0 (hidraw)
UDEV  [609040.940254] add      /class/usbmisc (class)
UDEV  [609041.018127] add      /devices/usb.1/12000000.dwc3/xhci-hcd.2.auto/usb3/3-1/3-1.1/3-1.1.2 (usb)
UDEV  [609041.028218] add      /devices/usb.1/12000000.dwc3/xhci-hcd.2.auto/usb3/3-1/3-1.1/3-1.1.2/3-1.1.2:1.0 (usb)
UDEV  [609041.041296] add      /devices/usb.1/12000000.dwc3/xhci-hcd.2.auto/usb3/3-1/3-1.1/3-1.1.2/3-1.1.2:1.0/usbmisc/hiddev0 (usbmisc)
UDEV  [609041.044758] add      /devices/usb.1/12000000.dwc3/xhci-hcd.2.auto/usb3/3-1/3-1.1/3-1.1.2/3-1.1.2:1.0/0003:0EEF:0005.0003 (hid)
UDEV  [609041.064862] add      /devices/usb.1/12000000.dwc3/xhci-hcd.2.auto/usb3/3-1/3-1.1/3-1.1.2/3-1.1.2:1.0/0003:0EEF:0005.0003/hidraw/hidraw0 (hidraw)
As we plug in the device, a bunch of events are fired by kernel in response to the connected device. By adding a new udev rule, we can react to these events in a multitude of ways, such as by executing a script that starts our driver. This rule should be placed in /lib/udev/rules.d/ and given a name of form XX-myrule.rules where XX is the ruleset’s priority; a priority of 90 means that all rules preceding this number are run first before that rule. A README file in /lib/udev/rules.d gives us some useful guidelines on this:
Files should be named xx-descriptive-name.rules, the xx should be
chosen first according to the following sequence points:

 < 60  rules shipped in packages; these can be overriden by later or
       default rules unless := is used in assignment.

       these cannot access persistent information such as that from
       blkid

 < 70  rules that run helpers such as blkid to populate the udev db

 < 90  rules that run other programs (often using information in the
       udev db)

 >=90  rules that should run last

Common locations for package rules:

 40-xx general rules, setting names and permissions
 65-xx rules to populate the udev db
 85-xx rules to run programs
Let’s start by creating a file called 91-waveshare.rules in /lib/udev/rules.d/ containing the necessary entries to make this happen:
ACTION=="add", SUBSYSTEM=="usb", DRIVER=="usb", ATTRS{idVendor}=="0eef", ATTRS{idProduct}=="0005", RUN+="/usr/bin/waveshare-touch-driver.sh"This should appear self-explanatory for the most part:
ACTION=="add"means the rule should be executed when the device is connected.ATTRS{idVendor}=="0eef"andATTRS{idProduct}="0005"dictate that the device’s vendor and product ID (VID:PID) should be0EEF:0005, which we determined earlier.RUN+="/usr/bin/waveshare-touch-driver.sh"means that this Bash script should be run when the device is plugged in.SUBSYSTEM=="usb"andDRIVER=="usb"means that we need to respond to an event that was fired by usb subsystem and usb driver. We do this to prevent our rule from firing more than once when the device is plugged in; recall that we received 6 events from udev when our device was plugged in. If we wouldn’t specify this specific event, our script would be run six times in different stages of preparation, when we would only need to do it once! The commandudevadm info --attribute-walk /dev/hidraw0should prove useful in finding out when we should react.
Writing the startup script
Although we can run pretty much any Bash script in response to an udev event, there’s one limitation we need to keep in mind: udev kills any script started by a rule after a short while. To work around this limitation, we should create a service that is started in response to the device being plugged in. Assuming your system runs systemd, create a file called waveshare-touch-driver.service in /lib/systemd/system and fill it out as such:
[Unit]
Description=Userspace driver for Waveshare touchscreens

[Service]
EnvironmentFile=/etc/waveshare-touch-env
ExecStart=/usr/bin/waveshare-touch-driver.py --devpath $DEVPATH

[Install]
WantedBy=multi-user.target
It’s pretty bare as far as systemd units go, but it contains two entries we should keep in mind.
ExecStartis the command we want to execute, or in other words, our driver. We pass it the device path given by the udev, which allows our driver to start reading from the correct device.EnvironmentFileis the file containing the sole environment variable we need: the device path we pass to the driver inExecStart: DEVPATH.
With the service in place, we can now write the script that’s started by udev when the “touchscreen was plugged in” event is fired: /usr/bin/waveshare-touch-driver.sh:
#!/bin/bash
echo "DEVPATH=\"$DEVPATH\"" > /etc/waveshare-touch-env
systemctl start waveshare-touch-driver.service
exit 0;
The script is very short; we write the device path we had received from udev as an environment variable to a file, which identifies our device and is read by systemctl when starting the service which starts our driver. udev runs the script with many other environment variables we could use, but in order to identify our device, we’ll use DEVPATH.
As of now, we now have an udev rule that starts a service representing our touchscreen driver, which is the last thing we need to write in order to get everything working.
Writing the driver
Before we start writing actual Python code that make up our driver, you need to install two libraries we’re going to need:
python-uinput, a Python API to the uinput kernel module, which allows us to write HID drivers that run in userspace.libudev-devandpyudev, a library that allows us to read information about the devices in Python instead of the command-line tools we’ve used so far.
Assuming you’re on Debian or another similar distribution, the following commands should install all the dependencies we need for this task:
sudo apt-get install python python-pip libudev-dev
sudo pip install python-uinput pyudev
After this, we can finally start writing the driver that’s going to read the device’s stream of data and turn it into events that allow the user to actually interface with the device. Let’s create /usr/bin/waveshare-touch-driver.py and get to it:
#!/usr/bin/env python
import argparse
import uinput
import pyudev
import os
import sys
import string
import glob
import struct
import time

if __name__ == "__main__":
    parser = argparse.ArgumentParser(description="Userspace driver for Waveshare touchscreens.")
    parser.add_argument('--devpath', type=str, required=True,
                        help="Devpath of the USB device (eg. /devices/usb.1/12000000.dwc3/xhci-hcd.2.auto/usb3/3-1/3-1.1/3-1.1.1/3-1.1.1.4). In normal operation this is passed automatically by udev.")

    args = parser.parse_args()

    devpath = args.devpath

    packet_length = None

    # Get the sys_name from the full devpath (eg. 3-1.1.1.4)
    sys_name = devpath[devpath.rfind("/")+1:]

    os.system("modprobe uinput")

    context = pyudev.Context()

    # Get the device loaded as /dev/hidraw*
    devices = context.list_devices().match(subsystem = "hidraw")

    for device in devices:
        if "0EEF:0005" in device.sys_path and "%s/" % sys_name in device.sys_path:
            # We found a matching device, let's try to grab it
            print("Device found!")

            # Get the serial number for this device, since it allows
            # us to give each device a deterministic name (eg. changing the USB slot it's plugged into
            # shouldn't affect the configuration)
            serial = get_serial(sys_name)

            if serial != None:
                print("Serial number for this device: %s" % serial)
            else:
                print("Couldn't find the serial number for this device!")
                serial = "UNKNOWN SN"

            device_file = "/dev/%s" % (device.sys_path[device.sys_path.rfind('/')+1:])

            grab_device(device_file, serial, packet_length)

    print("Device not found!")
Aside from the modules we have to import and the argument parser,
we derive the device’s sysname from the full device path and start the uinput kernel module
(in case it hadn’t been started yet) by calling modprobe uinput,
which is a precondition to creating and starting our userspace driver.
    # Get the sys_name from the full devpath (eg. 3-1.1.1.4)
    sys_name = devpath[devpath.rfind("/")+1:]

    os.system("modprobe uinput")
After that, we create a Pyudev context that allows to iterate through all of the matching devices to find the same device passed by udev through the DEVPATH environment variable.
    context = pyudev.Context()

    # Get the device loaded as /dev/hidraw*
    devices = context.list_devices().match(subsystem = "hidraw")

    for device in devices:
        if "0EEF:0005" in device.sys_path and "%s/" % sys_name in device.sys_path:
            # We found a matching device, let's try to grab it
            print("Device found!")

            # Get the serial number for this device, since it allows
            # us to give each device a deterministic name (eg. changing the USB slot it's plugged into
            # shouldn't affect the configuration)
            serial = get_serial(sys_name)

            if serial != None:
                print("Serial number for this device: %s" % serial)
            else:
                print("Couldn't find the serial number for this device!")
                serial = "UNKNOWN SN"
Again, recall that we need to figure out the serial number for this particular device, so that we can give it a meaningful name.
We’ll use a new method to iterate through a different, but mostly similar list of devices to find the serial number,
filtering by the device’s sysname (eg. 3-1.1.1.4) instead of the device file name (eg. /dev/hidraw0).
In my case, the serial number also had an unprintable character that wouldn’t appear when printing the serial number
but would throw the string comparisons off; we also remove such characters here to prevent any undue misery
caused by two identical looking strings not evaluating to being identical.
def get_serial(sys_name):
    """
    Get the serial number for a device based on its sys_name
    """
    devices = context.list_devices(sys_name=sys_name)

    for device in devices:
        try:
            serial = device.attributes["serial"]

            # Serial numbers appear to have non-printable characters inside them
            # Remove those characters here
            serial = "".join(filter(lambda x: x in string.printable, serial))
            return serial
        except:
            pass

    return None
Continuing on after we’ve retrieved the serial number, we retrieve the path to the device file (of form /dev/hidrawX) which we’ll be using to read the device output.
            device_file = "/dev/%s" % (device.sys_path[device.sys_path.rfind('/')+1:])

            grab_device(device_file, serial, packet_length)
Now, it’s the matter of writing the method that opens the device file for reading and reacts accordingly when the user presses somewhere on the screen.
Here we create the uinput device that we will be using to emit events (screen touched at (X,Y) position, press released)
which will then lead to corresponding events happening on screen: when user presses the screen,
the pointer is moved to and pressed on that location.
Note here that we are also giving the created device a name that includes the serial number;
this makes it easier for device-specific configurations (such as calibration) to be saved without mixing different devices together.
In addition, we’ve also included tuples with the uinput.ABS_X and uinput.ABS_Y events.
These tuples correspond to the min, max, fuzz and flat variables (eg. min=0, max=4000, fuzz=0, flat=0).
The only ones that matter in our case are the min and max, which define the minimum and maximum values our ABS_X and ABS_Y events may have,
which correspond to the minimum and maximum values the X and Y positions in the device messages.
This can be determined by listening to device output using the xxd command as described earlier and
touching the different sides of the screen; this should give a good idea of what minimum and maximum values you should use.
def grab_device(device_file, serial, packet_length=None):
    """
    Grab an active touchscreen
    """
    emulated_device = uinput.Device([
        uinput.BTN_TOUCH,
        uinput.ABS_X + (0, 4000, 0, 0),
        uinput.ABS_Y + (0, 4000, 0, 0),
        uinput.ABS_PRESSURE,
    ],
    name="Waveshare Touchscreen (%s)" % serial,
    vendor=0x0eef,
    product=0x0005)
Next on, we open the device file for reading as we would do with any other file.
    try:
        with open(device_file, 'rb') as f:
            # We don't know the packet length yet
            if packet_length == None:
                packet_length = 0
                found_tag = False
                zero_byte_count = 0

                print("Packet length unknown for this device, keep poking the screen until I figure it out.")

                while True:
                    sample = f.read(1)

                    # Each packet starts with the tag 'aa' in hex
                    # After we find the first tag, we start counting the number of bytes
                    # until the next tag
                    # Also make sure the tag is followed by two or more zero bytes so we don't mistakenly
                    # pick the tag from elsewhere
                    if sample[0] == b'\x00' and found_tag:
                        zero_byte_count += 1
                        packet_length += len(sample)
                    elif sample[0] == b'\xaa' and not found_tag:
                        found_tag = True
                        packet_length += len(sample)
                    elif sample[0] == b'\xaa' and found_tag and zero_byte_count >= 2:
                        # We found the tag again and it was followed by two or more zero bytes
                        break
                    else:
                        zero_byte_count = 0
                        packet_length += len(sample)

                # Packet length is now known, this blocking read is done
                # so that the following reads always start with the tag as they should
                f.read(packet_length-1)
                print("Packet length for this device is %d bytes." % packet_length)
            else:
                print("Using provided packet length: %d" % packet_length)
This is the first part where we determine the length for the messages sent by the device.
As mentioned, these messages can either be 22 or 25 bytes long, so to determine how many bytes we should read at once,
we read samples of the output, counting the amount of bytes from the first aa tag to the next aa tag,
which should be followed by at least two zeros to prevent us from picking up the tag earlier by accident
and giving us an incorrect packet length.
After we’ve determined this, we can move to the second stage of the driver
where we start emitting events that correspond to the user’s actions.
            # The last coordinates for the device when it was touched
            last_x = 0
            last_y = 0

            while True:
                try:
                    packet = f.read(packet_length)
                except OSError:
                    print("Read failed, device was probably disconnected")
                    exit()

                (tag, clicked, x, y) = struct.unpack_from('>c?HH', packet)

                if clicked:
                    last_x = x
                    last_y = y

                    emulated_device.emit(uinput.BTN_TOUCH, 1, False)
                    emulated_device.emit(uinput.ABS_X, x, False)
                    emulated_device.emit(uinput.ABS_Y, y, False)
                    emulated_device.emit(uinput.ABS_PRESSURE, 255, True)
                else:
                    emulated_device.emit(uinput.BTN_TOUCH, 0, False)
                    emulated_device.emit(uinput.ABS_X, last_x, False)
                    emulated_device.emit(uinput.ABS_Y, last_y, False)
                    emulated_device.emit(uinput.ABS_PRESSURE, 0, True)
    except OSError:
        print("Device disconnected.")
        exit()
We unpack the message into variables containing the variables we need: X and Y coordinates of the touched spot and whether the user pressed or stopped pressing the screen.
Depending on whether the user has pressed the screen, we emit input events where we pass the X, Y coordinates, whether the screen was pressed and how much pressure the user is applying (which will be 0 for not touching and 255 for touching, since the device we have doesn’t provide a value for pressure). The events are pipelined together, meaning the messages are sent together atomically, instead of sending them individually one at a time.
If we fail to read the device file, we can simply assume the user has disconnected the device, at which point we close the driver.
At this point, our driver should be ready for action and look somewhat like this (apart from a few parts I’ve removed from the example for brevity) and assuming you’ve either reloaded both udev rules and systemctl units or rebooted the system, you should be able to plug your touchscreen in at a whim and have it working without manually launching the driver at all. That said, you’ll probably want to calibrate it using xinput-calibrator before putting it into real use.
Closing thoughts
After all the work you’ve done, you should now have a working touchscreen for the touchscreen linked in the beginning of this blog post. Though the driver we wrote is slower than a kernel module written in C, it illustrates the point that once you are able to interpret the device’s messages, writing a working driver for a touchscreen would only require a few hours of work and a decent knowledge of Python.